Introduction 
Previously, I described my experience with ZSH here. Now, things are a bit different; I have fully switched to Powerlevel10k.
It’s a very beautiful and convenient shell prompt that is easy to install and configure on the fly.
Configuring p10k 
You can configure p10k very easily, right on the go, even ten times a day.
I have embedded the installation of p10k directly in my .zshrc, so you don’t even have to follow the official instructions on the website. Well, almost. There are recommended fonts to ensure everything looks good, which are described here. Below, I recorded and showed what the configuration of p10k looks like. Unfortunately, the asciinema recording shows the beautiful elements as squares since these symbols are not supported in the recording. So, here’s a screenshot of the terminal window.
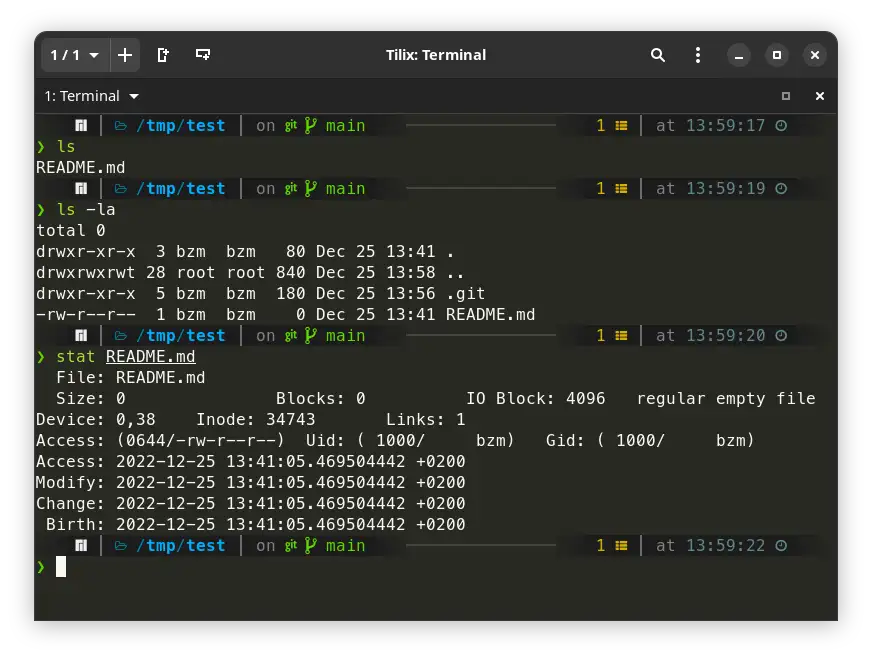
While the recording didn’t turn out very well, at least I can show you the menus.
Explanation of my .zshrc 
Everything written below consists of snippets from my .zshrc, which you can download at the end of the article. For your convenience, I will duplicate the link here.
Installing p10k 
This is done with a simple condition and direct cloning from GitHub. If we have Git and p10k is not yet installed, we can clone it.
1
2
3
4
| if command -v git >/dev/null && [ ! -d ~/powerlevel10k ]; then
echo "info: installing p10k"
git clone --depth 1 --single-branch https://github.com/romkatv/powerlevel10k.git ~/powerlevel10k
fi
|
Plugins 
I install plugins simply by cloning them from GitHub. I added comments directly in the code for clarification.
 1
 2
 3
 4
 5
 6
 7
 8
 9
10
11
12
13
14
15
16
17
18
19
20
21
22
23
24
25
26
27
28
29
30
31
32
33
34
35
36
37
38
39
40
41
42
43
44
| # if we have git installed
if command -v git >/dev/null; then
# and folder with plugins is absent
if [ ! -d /usr/share/zsh/plugins ]; then
# let's create it with sudo
sudo mkdir -p /usr/share/zsh/plugins
fi
# and jump in
cd /usr/share/zsh/plugins
# now, let's read every line between <<EOF and EOF lines below
while IFS= read -r REPO; do
# and for every line, which will be available in variable named REPO
# let's cut only last part of the url (ex: zsh-autosuggestions.git) and save to BASENAME var
BASENAME="$(basename "$REPO")"
# now, we will remove .git from the end of BASENAME and check either such folder exists
if [ ! -d "${BASENAME%.git}" ]; then
# if not, let's print an info message
echo "${REPO}: Cloning to $(pwd)/${BASENAME%.git}"
# and finally clone that plugin
sudo git clone --depth 1 --single-branch "$REPO"
fi
done <<EOF
https://github.com/zsh-users/zsh-history-substring-search.git
https://github.com/zsh-users/zsh-syntax-highlighting.git
https://github.com/zsh-users/zsh-autosuggestions.git
EOF
# after all plugins cloned, we cd back to the location we were
cd - >/dev/null
fi
# okay, now we assume that all plugins are cloned and we have to include them
# once again, for every hardcoded path to .zsh file
while IFS= read -r SOURCE; do
# we skip the plugin if it starts with '#' (commented out)
if echo "$SOURCE" | grep -qE '^#'; then
continue
elif [ -s "$SOURCE" ]; then
# if it is enabled, we just include it in current shell session with source command
source "$(realpath "$SOURCE")"
fi
done <<EOF
/usr/share/zsh/plugins/zsh-history-substring-search/zsh-history-substring-search.zsh
/usr/share/zsh/plugins/zsh-syntax-highlighting/zsh-syntax-highlighting.zsh
/usr/share/zsh/plugins/zsh-autosuggestions/zsh-autosuggestions.zsh
EOF
|
Adding Paths to PATH 
Often, we install additional binaries in non-standard folders. For example, I use ~/.local/bin for various tools like kubectl, helm, k9s, and others. Here, we check each folder, if it exists, and add it to the PATH variable.
1
2
3
4
5
6
7
8
9
| while IFS= read -r P; do
if [ -d "$P" ]; then
export PATH="${P}:${PATH}"
fi
done <<EOF
${HOME}/.local/share/gem/ruby/3.0.0/bin
${HOME}/projects/stm32/gcc-arm-none-eabi-10.3-2021.10/bin
${HOME}/.local/bin
EOF
|
Aliases 
Here everything is straightforward, with lots of different aliases.
 1
 2
 3
 4
 5
 6
 7
 8
 9
10
11
12
13
14
15
16
17
18
19
20
21
22
23
24
25
| alias ..="cd .. && ls -lhA --color=auto"
alias d='sudo -E docker'
alias dc="docker-compose"
alias e="exit"
alias j="sudo journalctl"
alias l="ls -lh --color=always"
alias la="ls -lhA --color=always"
alias p="ping 8.8.8.8"
alias please='sudo'
alias reborn="sudo shutdown -r now"
alias s='sudo'
alias sctl="sudo systemctl"
alias svi="sudo vim"
alias svim="sudo vim"
alias t='terraform'
alias k="kubectl"
alias kd="kubectl describe"
alias kg="kubectl get"
alias ky="kubectl get -o yaml"
alias ke='kubectl exec -it'
alias vi="vim"
alias g="git"
alias b="sudo btrfs"
alias c="code ."
alias ansible-time="time ansible-playbook"
|
Git Config 
By the way, I also have a Git config. The link is here or the same at the end of the page. Two interesting commands here:
git ps - pushes the branch, and if it doesn’t exist yet, it catches the message from the Git error log and pushes with –set-upstream.git dpush (dummy push) - adds all files and folders to the commit, writes a standard commit message, and pushes.git cc - simply makes a commit with a standard message.
 1
 2
 3
 4
 5
 6
 7
 8
 9
10
11
12
13
14
15
| [alias]
co = checkout
a = add .
ci = commit
cc = commit -m 'Nothing special. Just regular commit.'
ps = ! sh -c 'git push >/tmp/git-ps 2>&1 || grep -- "git push --set-upstream" /tmp/git-ps | sh'
pt = push --tags
pts = ! sh -c 'git push && git push --tags'
pl = pull
st = status
br = branch
hist = log --pretty=format:'%h %ad | %s%d [%an]' --graph --date=short
type = cat-file -t
dump = cat-file -p
dpush = ! sh -c 'git add . && git commit -m "Nothing special. Just regular commit."' && git push
|
KUBECONFIG 
Here, we look for the standard kubeconfig for k3s or rke2 and set it in KUBECONFIG.
 1
 2
 3
 4
 5
 6
 7
 8
 9
10
11
12
13
14
15
16
17
18
19
20
21
22
| # if there is no file at the path that is already being set in KUBECONFIG var
if [ -z "$KUBECONFIG" ]; then
# for every filepath from the list below
while IFS= read -r K; do
# check if file exists and it is not empty
if [ -s "$K" ]; then
# change owner and group to current user
if ! stat -c '%u:%g' "$K" | grep -qF "$(id -u):$(id -g)"; then
sudo chown "${USER}:${USER}" "$K"
echo "info
: chown $K"
fi
# assign it to the KUBECONFIG variable
export KUBECONFIG="${K}:${KUBECONFIG}"
fi
done <<EOF
/etc/rancher/rke2/rke2.yaml
~/.kube/config
~/.kube/k3s.yaml
EOF
fi
|
Here’s the translated content of your Hugo page section into English, formatted in valid Markdown:
Automatic Utility Downloads 
Here’s what’s happening: .zshrc automatically checks to ensure that we have the binaries of the utilities we use installed. If the utility is missing, it downloads it; if not, it does nothing. However, I can manually update k9s by executing _update_k9s. This section installs the following utilities:
- k9s - more details in my article
- kubepug - a tool for checking deprecated APIs in the cluster before upgrading the Kubernetes version
- kubecolor - a wrapper around kubectl for colorful output
 1
 2
 3
 4
 5
 6
 7
 8
 9
10
11
12
13
14
15
16
17
18
19
20
21
22
23
24
25
26
27
28
29
30
31
32
33
34
35
36
37
38
39
40
41
42
43
44
45
46
47
48
49
50
51
52
53
54
55
| _update_kubepug() {
mkdir -p ~/.local/bin
LOCATION="$(curl --connect-timeout 1 -sS https://github.com/rikatz/kubepug/releases/latest -D- | awk '/^location:/{print $2}')"
LATEST_VERSION="$(echo "$LOCATION" | awk -F/ '{print $NF}' | grep -oE '[0-9a-zA-Z_.-]+')"
if ! k9s version --short | grep -qF "$LATEST_VERSION"; then
printf "Updating kubepug to %s\n" "$LATEST_VERSION"
printf 'https://github.com/rikatz/kubepug/releases/download/%s/kubepug_linux_%s.tar.gz' \
"$LATEST_VERSION" "$(uname -p | sed 's/unknown/amd64/g' | tr -d '[[:space:]]')" | \
xargs curl -sSL | \
tar -xpzf - kubepug
install kubepug ~/.local/bin/kubepug -m 0755
rm -f kubepug
fi
}
if ! command -v kubepug &>/dev/null; then
_update_kubepug
fi
_update_k9s() {
mkdir -p ~/.local/bin
LOCATION="$(curl --connect-timeout 1 -sS https://github.com/derailed/k9s/releases/latest -D- | awk '/^location:/{print $2}')"
LATEST_VERSION="$(echo "$LOCATION" | awk -F/ '{print $NF}' | grep -oE '[0-9a-zA-Z_.-]+')"
if ! k9s version --short | grep -qF "$LATEST_VERSION"; then
printf "Updating k9s to %s\n" "$LATEST_VERSION"
printf 'https://github.com/derailed/k9s/releases/download/%s/k9s_Linux_%s.tar.gz' \
"$LATEST_VERSION" "$(uname -p | sed 's/unknown/x86_64/g' | tr -d '[[:space:]]')" | \
xargs curl -sSL | \
tar -xpzf - k9s
install k9s ~/.local/bin/k9s -m 0755
rm -f k9s
fi
}
if ! command -v k9s &>/dev/null; then
_update_k9s
fi
_update_kubecolor() {
mkdir -p ~/.local/bin
LOCATION="$(curl --connect-timeout 1 -sS https://github.com/hidetatz/kubecolor/releases/latest -D- | awk '/^location:/{print $2}')"
LATEST_VERSION="$(echo "$LOCATION" | awk -F/ '{print $NF}' | grep -oE '[0-9a-zA-Z_.-]+' | sed 's/^v//g')"
if ! kubecolor --kubecolor-version | grep -qF "$LATEST_VERSION"; then
printf "Updating kubecolor to %s\n" "$LATEST_VERSION"
printf 'https://github.com/hidetatz/kubecolor/releases/download/%s/kubecolor_%s_Linux_%s.tar.gz' \
"v$LATEST_VERSION" "$LATEST_VERSION" "$(uname -p | sed 's/unknown/x86_64/g' | tr -d '[[:space:]]')" | \
xargs curl -sSL | \
tar -xpzf - kubecolor
install kubecolor ~/.local/bin/kubecolor -m 0755
rm -f kubecolor
fi
}
if ! command -v kubecolor &>/dev/null; then
_update_kubecolor
alias kubectl="kubecolor"
typeset -g POWERLEVEL9K_KUBECONTEXT_SHOW_ON_COMMAND="${POWERLEVEL9K_KUBECONTEXT_SHOW_ON_COMMAND}|kubecolor"
fi
|
Additionally, for several commands, if they exist, automatic loading of completion scripts is performed so that zsh knows what to suggest.
1
2
3
4
5
6
| ## Completions for 3rd-party binaries
for COMMAND in kubectl helm k3d flux kubepug; do
if command -v "$COMMAND" >/dev/null; then
source <("$COMMAND" completion zsh)
fi
done
|
Separate Environments 
This is the smartest and at the same time simplest trick in my arsenal. The most valuable thing in work is that when you work on different projects/environments, the scariest thing you can do is to break something. The easiest way to do that is forgetting to switch to the desired environment and apply something where you didn’t intend.
This snippet of code prevents exactly that.
1
2
3
| if [ -f env.sh ]; then
source ./env.sh
fi
|
It’s that simple. What actually happens? When zsh starts, it checks the directory it was launched from, and if there’s a file named exactly env.sh, it includes it in the context. Let me explain.
I use Ranger for navigation through folders from the terminal. Let’s say I’m working on a project and also have a blog. I created the following directories for my projects.
 1
 2
 3
 4
 5
 6
 7
 8
 9
10
11
12
13
| .
├── MyBlog
│ ├── env.sh
│ └── kubeconfig.yaml
└── SuperWorkProject
├── development
│ ├── env.sh
│ └── kubeconfig.yaml
└── production
├── env.sh
└── kubeconfig.yaml
4 directories, 6 files
|
In my production project, I have two environments, all running Kubernetes, each with its separate kubeconfig.yaml. Let’s say I need to work on production. In its env.sh, I will write the following.
1
2
3
4
5
6
7
8
| #!/usr/bin/env sh
export KUBECONFIG='~/projects/SuperWorkProject/production/kubeconfig.yaml'
export AWS_PROFILE='production'
pf() {
nohup sh -c 'kubectl get po -n monitoring -l app.kubernetes.io/name=grafana -o name | xargs -I{} kubectl port-forward {} 3000' 1>/dev/null &
}
|
Now, I just open zsh in this folder or run source ./env.sh. That’s it; now I’m sure I’m working with production. Additionally, I declared a function for port-forwarding.