Introduction 
When needing to access a server located behind NAT, direct connection cannot be made. Instead, we need to come up with alternative methods. We’ll explore how to use both direct and reverse SSH tunnels for these purposes.
Tunnels 
Reverse Tunnel 
- Created from the target server (CS) to a intermediate (PS).
- Socket created on PS.
- Direct tunnel - created from the initial server (NS) to PS.
- Socket located on NS.

Using two tunnels, we can access CS. Ports for any website or even just SSH server in CS can be cast and gain access into the system. SOCKS5 proxy can also be used to exit the network through CS.
Intermediate Server must be accessible from both CS and NS
Creating User on PS 
Using a user that can only create tunnels is recommended for security purposes. Below code creates a new user with no home directory or interpreter:
| |
Reverse Tunnel 
Now let’s move on to creating tunnels. We’ll need a reverse tunnel from PS to CS.
Below is sshpass command, which is necessary for automatically entering passwords when connecting via SSH:
| |
Creating the reverse tunnel on CS:
| |
ssh-keyscan -H jump-hostadds SSH Server’s key to PS’s known hosts.-fNexecutes command and doesn’t create a tty session.-Rcreates the reverse tunnel.2222:localhost:22translates into: proxying 127.0.0.1:2222 (default localhost) to PS at 127.0.0.1:22 on CS. So, it does exactly this: proxies 127.0.0.1:2222 from NS’s default addresslocalhostto PS’s address127.0.0.1. Now we can access CS via PS.- Checking the tunnel can be done with:
| |
Direct Tunnel 
To get into reverse tunnel on PS, a direct tunnel from NS needs to be created:
| |
1234:localhost:2222translates into: proxying 127.0.0.1:1234 from NS to PS at 127.0.0.1:2222 on CS, which means proxying from NS’s addresslocalhostat port1234to PS’s address127.0.0.1at port2222. So, now we can access reverse tunnel on PS using direct tunnel.- To access the tunnel:
| |
SOCKS5 Proxy 
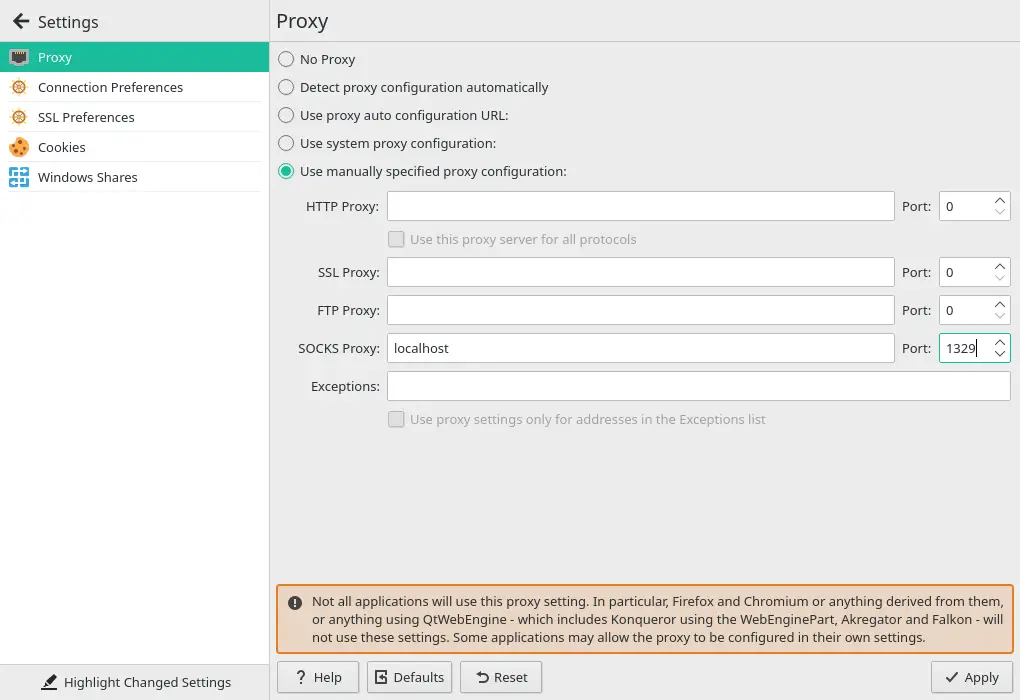
We can set up any browser to use a SOCKS5 proxy for directing all traffic. This is convenient when trying to access resources in local network CS from NS. After creating tunnels, the following command needs to be executed on NS:
| |
And to configure a browser’s SOCKS5 proxy settings, look at this screenshot.

